

In addition to the mending, the other thing I did on Sunday was to make a new peg bag for the clothespegs which hang outside waiting to be used when the weather is decent. Of course, the weather hasn't been decent for some time, so it wasn't until just recently that I noticed just how awful the existing bag was...

It was very faded, and of course

a little mouldy - which wasn't surprising, as it does hang outside all year round, and even though it's quite sheltered by the house, it's still outside.

You can see here, inside the seam, just how faded the fabric was - it was quite bright when it was new!

I started by turning it inside out and finding some fabric big enough for the back


and the front. I chose some hand-dyed (or in the case of the piece for the back, sunprinted) fabric because it was of a quite thick, sturdy fabric, which I thought would wear better when exposed to the elements.

Then I took the bag apart - into only three pieces - the back (a large, single piece) and the two front pieces (this is how the opening in the bag to put your hand in to get the pegs is formed).

And I used the pieces as patterns to cut the new fabric. They had stretched a bit, and even with ironing, they weren't totally even, so I folded them, cut around them best I could, leaving a seam allowance on the two sides of the front pieces which needed hemming. I then hemmed the bottom of the top front piece and the top of the bottom front piece, and laid the front and back pieces together right sides together and pinned it. I then trimmed a little as the back and front weren't totally even (all that hanging in the elements!)
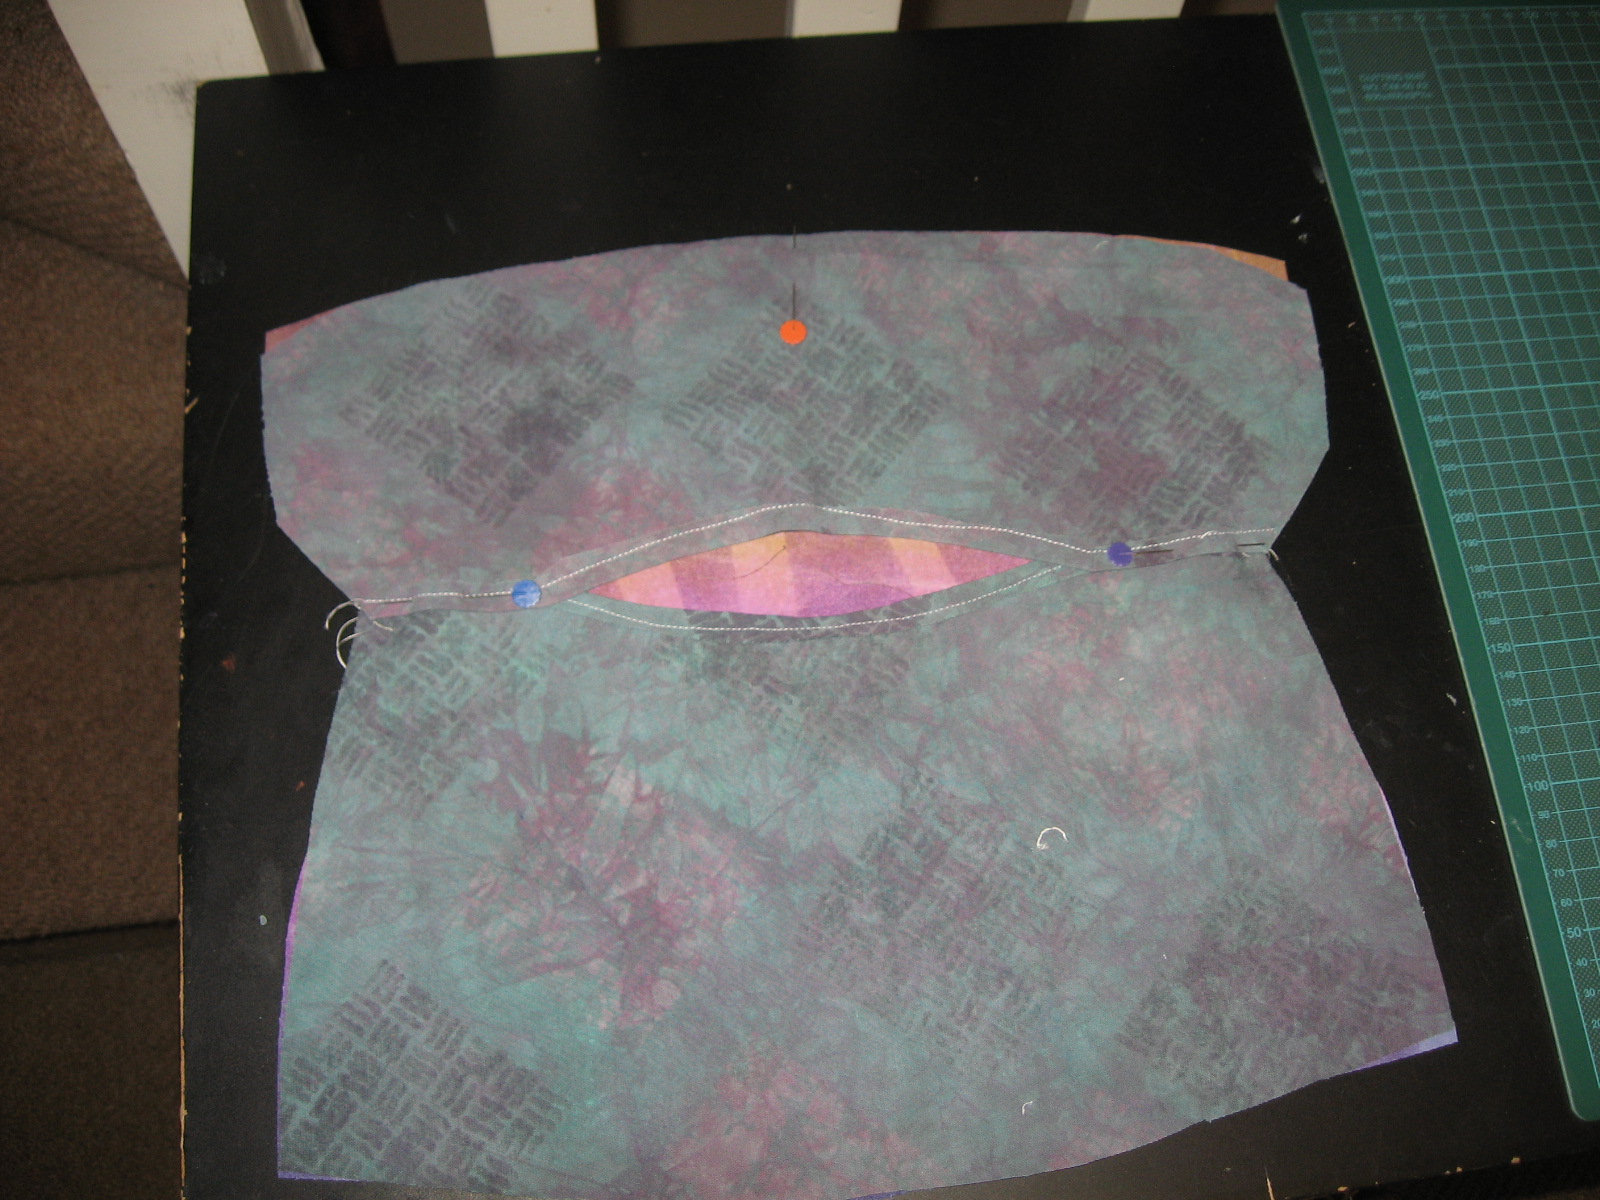
The orange pin at the top is where I needed to remember to leave a very small gap in the seam to put the hanger through. The two pins at the side are where the two halves of the front join. After seaming, I turned it right side out, pushed out the corners and put the hanger back in. I decided that rather than just stitching the side edges together, I'd use a little button at this point - or rather, two - one on each side.

And that was it - I think it took about half an hour, including the time to select fabric and deconstruct the old bag.

Here's the back of the bag - the front is, of course, at the top of the post!
4 comments:
I need a new peg, for exactly the same reasons. thanks for the idea.
I need a new peg, for exactly the same reasons. thanks for the idea.
My peg container is a plastic mesh -- I replace it every couple of years. Here in Sydney we can hang clothes outside most of the year!
It looks so cute. I need to make myself one of them too. Mine has a huge hole in it.
Post a Comment