Sunday, July 17, 2011

Scrappy Checkerboards


Here's a start on the other colourway of checkerboard blocks which I mentioned yesterday - all these blocks are done with the same neutral background, but I have used 10" squares of hard-to-use multicoloured FQs or smaller. These pieces are either ones which I have been given, which came with a set where I found uses for the others but hadn't been able to use these yet, or which I bought on sale but then couldn't quite find a way to use in most of my projects. We all have pieces like that, I'm sure. I am going to continue sashing with the neutral, and then border with it all around - I might piece a back together from some of the leftovers as well (or might use another hard-to-use multicolour print!).

Thanks to everyone who has taken the time to comment for my giveaway - it's interesting to see what people remember of the projects I've worked on - I'm not going to respond to all individually, but don't worry, when it comes time for the draw, you'll all be in there (unless you've asked not to be...)

Saturday, July 16, 2011

Liberated Checkerboards


This month's block lotto features a liberated checkerboard block, a bit similar to the tic-tac-toe blocks we made a while back, but more cuts across initially, and no inserted strips. I've made 5 pairs of blocks in the lotto colourway, but am also working on some more in other fabric as a scrap-busting (or in this case, small-piece-of-fabric-busting) project. I hope to show those tomorrow...

I also finally finished the tote bags, which I will wait until Friday to show, just in case any of the recipients are lurking out there in blogland/Facebook...

Friday, July 15, 2011

Inspirational Giveaway


Courtesty of British Patchwork & Quilting magazine, I have two copies of this lovely project booklet to give away - it's a magazine style project collection. There are 12 projects, of varying sorts - different sizes, styles, techniques, and so on.

If you are interested in winning one of these copies, all you have to do is leave a comment on this post telling me which one of the things that I've worked on this year (or so) is your favourite - you don't have to say why, but of course you may if you like, and it doesn't have to be something I've actually finished (good thing, eh?!). It doesn't matter if you are a long-time reader or a newcomer or somewhere in between - but I am asking for you to name a project just to make sure people who enter do actually spend at least a LITTLE time here!

At the end of July, I will draw two names (or more likely, generate two random numbers, though you never know, I might print the comments out and actually pull slips out - I guess it will depend on how many people leave comments) and those people will win the prizes...

Have fun & a big thanks to P&Q for the prizes!

Thursday, July 14, 2011

15 minutes of fame


...or maybe not even that much! Nonetheless, my blog has been chosen to appear in (British) Patchwork & Quilting's August issue, in their web column, with a nice little blurb about it. The August issue is on sale from tomorrow (July 15th), and if you watch this space, I'll have a little contest going shortly (i.e. tomorrow), prizes courtesy of P&Q!

Wednesday, July 13, 2011

Cross stitch Wednesday


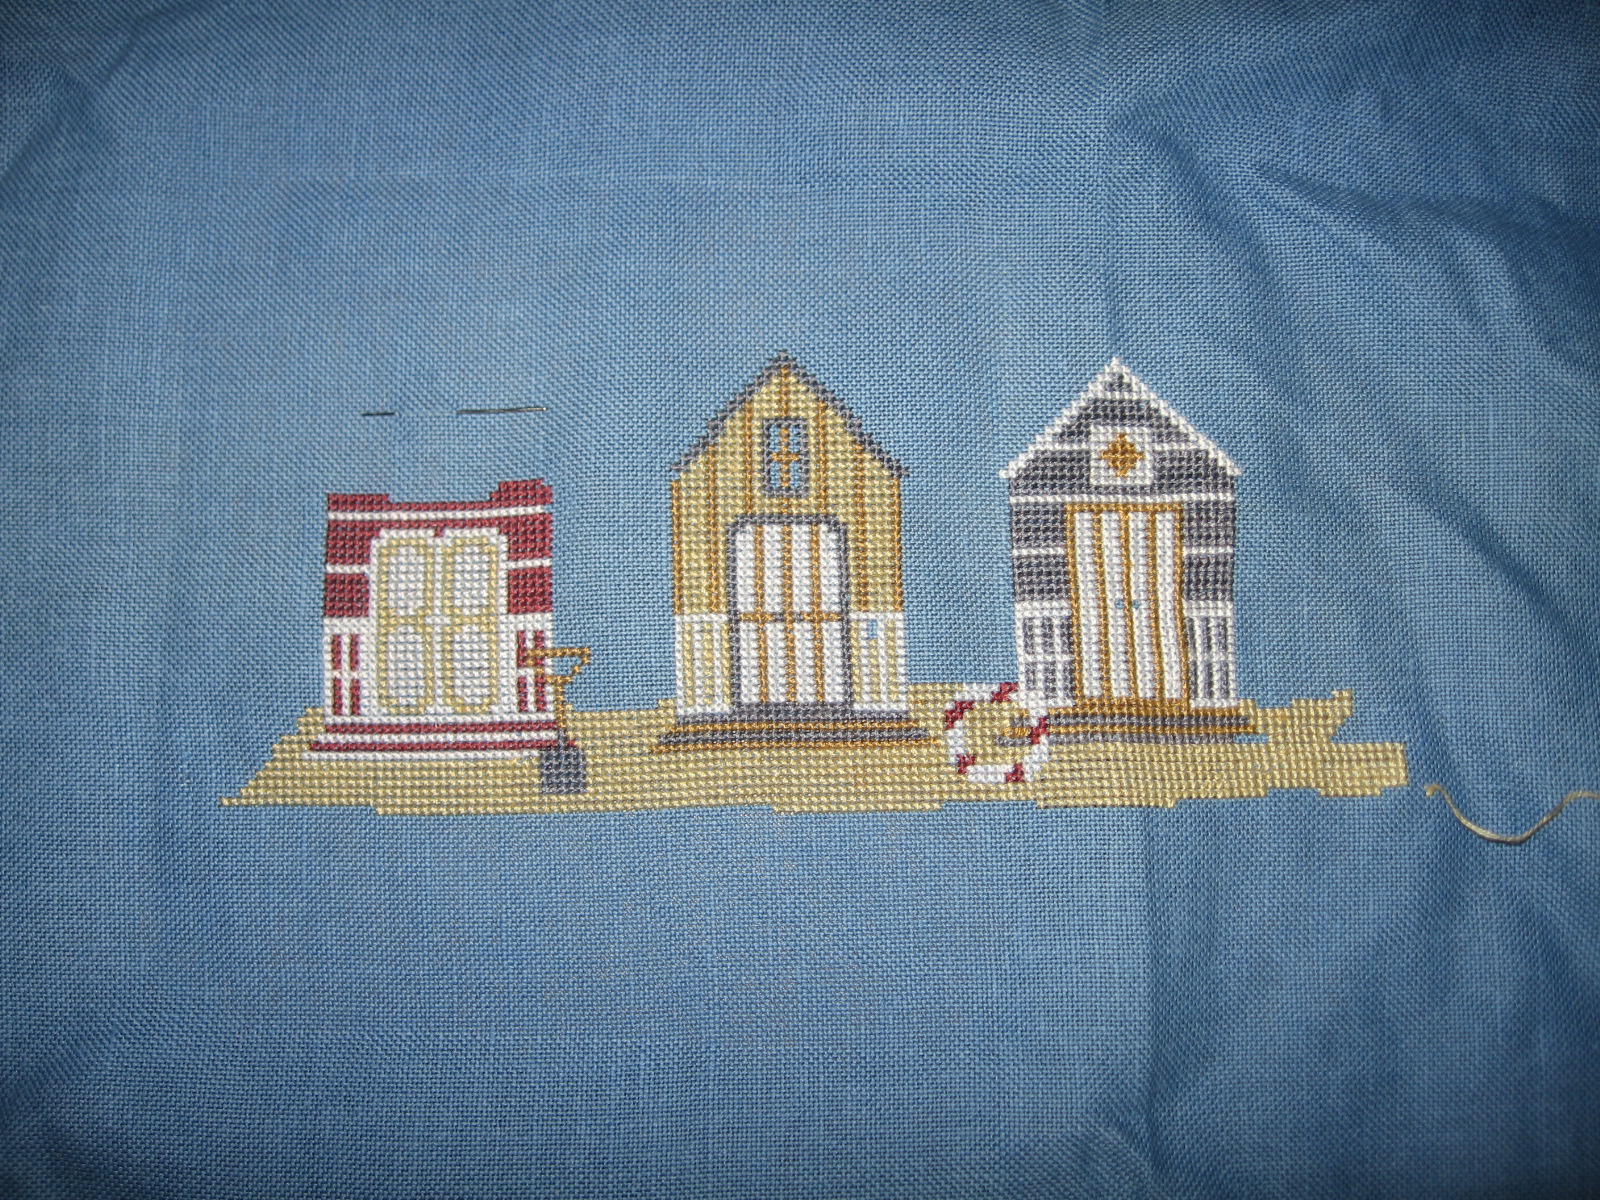
Not much done this week - just the doors on the red beach hut. Frankly, given how busy we are this week (and next) it's surprising there's any progress to show at all!

Tuesday, July 12, 2011

Someday I may learn...


...to just say no. Or perhaps not. For the past few years, I've quite happily agreed to help sew the backdrop together for the Year 6 play at school. So when asked again this year, no problem. What I didn't realise when I agreed was that instead of the usual couple of cheap king-size white sheets to seam so people could paint scenery, I was going to get 20 metres (yes, 20!) of shocking pink nylon (it might be something else - who knows - I just am sure it's not cotton or even a polycotton!) sparkly oh my god fabric to work with. The piece needed to be 3.6m x 5m. I had a 20 m roll. I'm not promising it's exactly 3.6mx5m but it's pretty close. And yes, it's hemmed all around. And yes, I fought with it and cursed it - it's incredibly slippery stuff, and even if I'd dared to iron it a bit to hold a crease for where the hems needed to be (I didn't dare, for fear than any iron hot enough to crease it would melt it!) I can't quite imagine manouevering it on my very small (i.e. normal sized) ironing board.

Sigh of relief that that's over! Next year, I hope they'll be back to using a couple of cheap king-size sheets! Though I have to say, it will look fabulous for the Beauty School Dropout scene (they are doing Grease).


I promise you, this closeup does not do this fabric justice - it's brighter, sparklier and a heckuva lot slippery-er in real life!

Monday, July 11, 2011

Tote bags


I know I showed a couple of these photos when I did the tutorial the other day, but here they are again, with one more - only two more to make! I did manage to buy some grosgrain ribbon in John Lewis on Sunday, which will do for handles for at least one of the remaining bags.


Sunday, July 10, 2011

Strippy Quilt


Another scrappy top today - this is one of the most efficient ways of using strings and strips up - you simply sew strips together longways (if they aren't long enough, you can first sew together strips of similar widths) until you get a big enough piece. This is a very small quilt - it was about 22x23" before the border. I basically just looked for strips roughly the width of my cutting mat, as that made it easy to judge the size when I was piecing. Today I really just felt like doing something a bit mindless, rather than something which would take thought (like the Farmer's Wife blocks or the July blocks for the Block Lotto) and this fit the bill very well. Still have too many dang blue strips, though!


And I sewed together the Log Cabin Corners from yesterday and added a small border around them to make them float a bit. Really like these blocks, and will probably do some again in different colourways. So easy and yet really effective!

Scrapbusting blog...


Because I am a madwoman (perhaps!) I have decided to start a new blog, entirely related to my efforts to work with my scrap and small pieces of fabric stash - there won't be much over there that's not here to start with, but I thought it would be fun to keep it all in one place; it might be a useful resources if you are looking for inspiration of what to do with certain of your scraps. In addition to highlighting blocks and/or tops that I've made using various sizes and shapes of scraps, I will probably also share places where I find good ideas for using up scraps and small pieces. There's a button in my sidebar - check it out! There's not a huge amount over there at the moment, but I'm sure it will grow....

Saturday, July 09, 2011

More Red, White & Blue


Amazingly enough, another Red, White & Blue Scrappy. This one is mostly blue, because I have lots of blue (like every other quilter I know). It looks wonky because it's not quite sewn together all the way yet - just in strips. I started out with blocks like this:


using whatever was in my small scraps - each block takes a 2" square of white , then the second round is 2x2" and 2x3.5" and the third round is 2x3.5" and 2x5" - which means I could use five inch squares up for the outer round (though for the red in particular, I also used some strips from stash).

Foolishly, when I made the blocks I decided to do half w/r/b and half w/b/r, forgetting than in an on point setting I would need more of one colour - hence the somehwat untraditional arrangement. But it works, I think. And it makes yet another (admittedly rather small) dent in my scraps.


Blue drawer before cutting


Blue drawer after cutting. Ok, there's a noticeable dent, but it's not big - and of course, there were some offcuts into the scrap basket!

Friday, July 08, 2011

Off to the longarmer


Here's the next quilt which is heading off to the longarmer. Someday, I will get all my larger quilts quilted and do something with them. Then it will just be the medium sized and small ones which I need to do something with!

Thursday, July 07, 2011

Swap announcement


Round 6 of Another Little Quilt Swap is now open. Go check out the details on the swap blog. And now Tina can stop nagging me!

Wednesday, July 06, 2011

Cross-stitch update


Not a huge amount done this week, as I lost two potential stitching evenings - one to watching Wallendar (in Swedish with subtitles, so I can't cross-stitch) and one to stitching down binding on the purple baby quilt. In a truly organised world, I would have quilted the baby quilt on Saturday (rather than Sunday) so I could have done the binding on it on Saturday night during Wallendar, but life doesn't always work that way!

Still, it's actually more progress than I thought it would be, comparing it with last week, so I'm happy.

The next two weeks (until the end of school) are going to be so busy in the evening, who knows how much time I will have, but even a small bit of progress is progress, right?

Tuesday, July 05, 2011

Finnished!


(Yes, yes, I know I spelled it wrong. The baby this quilt is for lives in Finland, so it's a play on words.) So, I did finish the binding last night and it's all ready to go. That's one down - and nearly two, as it happens, because Lana was quilting the joint baby quilt yesterday, so it won't be long before I have that one back to put binding on. That particular baby isn't due until the end of October, so I will be well ahead of schedule there!

Monday, July 04, 2011

Tote-orial


So, the time of year to give presents to teachers has come again, and pinching (and modifying) an idea from Cathi, who made patchwork baskets (though she hasn't blogged them yet), this year I decided to sew something. Not patchwork baskets, though, as there are 5 gifts required - teacher and TA in two classes, plus an extra TA in Olivia's class who mainly supports one of the other students, but who Olivia is very close to (and anyway, it would look stingy to give gifts to the others and not her even if that weren't the case). So, something quick and easy and which can be done with materials already on hand. The answer... totebags! Not much is quicker or simpler, particularly if you have some bag strapping, but even if you don't, it doesn't take that long. This sushi-themed tote took me about half an hour, and I was carrying on a conversation with Alex at the same time, so I'm sure it would have gone faster if I hadn't had that extra task... The sushi bag has handles made from fabric, too, so if I'd had some suitable handle strapping, another few minutes could have been shaved off.

I didn't decide to do a tutorial until the second bag, though, so the photos will be of that, not the sushi one. There are almost no measurements in this tutorial, as you can adapt the method to suit the size and shape of bag you want to make. It should still be fairly easy to follow along - I hope so, at any rate.


To begin with, you will need two rectangles of fabric - one for the outside of the bag and one for the lining. They don't have to be quilting cotton, though most of mine are because that's what I have lying around. I do recommend the lining fabric is something quite thin and easy to work with, even if you choose something a bit thicker for the outside of the bag. The rectangles should be approximately twice the size you want the finished bag to be, so that you can fold it in half to achieve the finished bag shape. It doesn't matter which direction you double it, though. [So for instance, let's say you want a finished bag which is approximately 18 inches deep and maybe 12 inches from edge to edge along the top when laying flat. You could start with a rectangle which is 18x24" and fold it in half along the 24" side OR you could start with a rectangle which is 12x36" and fold it in half along the 36" side. The only difference in the end is that you will have a seam down one side but none along the bottom if you choose the former and along the bottom but not on either side if you choose the latter. If you have a directional fabric, it will obviously make a difference what you do! You could also start with two pieces and piece them together (for instance if you wanted to use up smaller bits) - so that two pieces which were each 12x18" could be joined together. I think you get the picture!]

In addition to your two rectangles, you will also need something for the handles. In this tutorial, I happened to have some strapping for bag handles, and just used two lengths of that - the handles should be approximately 2" longer than you want the finished straps to be. If you don't have any strapping, you can make your own handles by using a long strip of fabric twice the width you want the finished handles to be (for the sushi bag I think I used a piece about 4" wide). Make a tube of the fabric by folding it in half the long way, seaming it, then turning it inside out - don't make it too narrow or not only will it be uncomfortable as a handle, but it will be the very devil to turn! You will need to make two of these tubes, again approximately 2" longer than you want the finished handles to be. If you like, you can press the finished tubes and top stitch them down both sides to make them lie flat - that's entirely up to you. It looks a little nicer in some cases, but it won't affect the functionality much. You can also pad them with scraps of wadding to make them more comfortable, but that's a lesson for another day...

Here are my two rectangles, folded in half to show the finished bag size - the blue floral will be the outside and the gold fabric, the inside.


You are now ready to begin sewing. Whew!


1. Step one is to stitch both rectangles into pillowcase shapes. So for my bag, I folded the fabric in half, right sides together, so the folded side will be at the bottom of the bag, and stitched up both sides. For the sushi bag, I worked the other way (as it's directional) and folded it so the bottom and one side were seamed and one side, folded. Do the same for the lining, EXCEPT for the lining, you will need to leave a small gap (approx 4-6") in one of the seamed sides or the bottom - doesn't matter which as it's for turning and it will be sewn up later.


Hopefully you can see my gap in the above photo!

The next bit is the tricky bit - or rather, it's not that tricky to do, but it's very tricky to describe it in words. I have taken a short video which sort of shows it- hopefully I'll be able to link to it on YouTube shortly as blogger doesn't want to upload it for some reason (very hard to video oneself doing something with one's hands...) but will try to put it in words, too. This is where you make the corners at the bottom of the bag, so that it's actually like a bag and not like carrying your stuff around in a pillowcase.

What you want to do is this. With the bag (or lining) still wrong sides out, grab the tip of one of the bottom corners of the bag and pull it into a triangle shape so that the side seam (or fold if the side isn't seamed) runs vertically through the point of the triangle. Lay it as flat as you can on your work surface to do this - it won't be totally flat as you move away from the tip of the triangle as the shape of the rest of the bag doesn't allow that, but that doesn't matter as it's only the tip of the triangle we are concerned with. Make sure it's evenly balanced so the seam is down the middle or your bag will be wonky.


This is what your corner should look like at this point.


Now you want to stitch across the tip of the triangle - how far down is up to you and will change the width of the bottom of the bag. The only important thing is to make sure you do all four corners (bag and lining) the same distance. I usually simply line up the tip of the triangle with the edge of the plate on my machine - then it's easy to eyeball it. I usually run back and forth across this seam 3 or 4 times for strength. Do all four corners - both on the bag, both on the lining.


Here's what the piece will look like after you've done this to both corners. This is the lining, still inside out, with pointy eared bits from where I've formed the corners.


Next, snip off the tips of the corners to get that extra fabric out of the way.


OK, handle time! Working with the outside of the bag (i.e. not the lining), turn it so that it is rightside out and lay it flat on the table with the seams lined up down the sides evenly. It's time to position the handles. Where you put the handles is up to you, but you don't want them too close to the sides of the bag, or too far towards the centre or it will be awkward to carry. I usually do mine about as you see here 1.5" to 2" from each edge. Pin one handle onto one side of the bag (don't pin through both layers!) with the handles going down as shown in the photo - they will miraculously end up the right way around once you have turned the bag, don't worry. Be sure not to twist the handle. Leave the loose ends of the handles protruding by a little bit - sticking up over the top of the bag - this is for added strength later when using the bag. If you are using made handles from fabric tubes, it's just the same. Then turn the entire piece over and attach the other handle to the other side, making sure to line it up with the first handle so they are even.


It's now time to make a bag sandwich. Keeping your bag outside with the right side facing out and the lining with the right side facing in, and being careful not to move the handles, put the bag outside INSIDE the bag inside (slip it right inside the pillowcase shape of the bag lining) and even up the edges. At this point, you can carefully move the pins to also grab the lining layer - don't move their location, just add that extra layer of fabric in. Be sure that the bag handles are pushed well down inside this bag sandwich so they won't get in the way when sewing. I also usually pin the side seams together and sometimes another pin or two at the top edge, depending on the size of the bag and other factors like the slippiness of the fabric.


Here's a photo of the bag sandwich - before I moved the pins to the current outside of the sandwich - i.e. the sewing surface. As you can hopefully see, the right side of the bag outer is touching the right side of the lining; the wrong sides of the bag outer are touching one another and what you are holding is the wrong side of the lining. Clear as mud? Trust me, it's much easier when you actually have it in front of you. It is very important that you get it the right way around, though, or your bag won't come out right when you turn it.


Easy step now. Stitch around the top of the bag, all the way around (be sure to only sew through two layers & one set of handles at a time!) . I usually go around at least twice, for strength, and often I do an extra backstitch and forward stitch across where the handles are attached. While stitching make sure the handles remain down inside the bag out of the way and don't get caught up in the sewing.


OK, you should now have this weird sandwichy thing, inside out, with the handles inside. This is where the gap you left in the side or bottom seam comes into its own. Open the gap, reach into it, and carefully pull the bag through, turning the lining right side out as you pull the outside of the bag through, like this:


At this point, especially if it's the first time you've ever made a bag this way, you will go "Oh, I get it" as you see the handles emerge - it really does seem like it's never going to work until you get to this point!


Here's the entire bag pulled through and flattened out.


But before you shape it into a proper bag, you need to quickly stitch up the gap in the seam where you pulled it through. This gap will either be in the side or the bottom of the lining. I just topstitch it neatly as it will be in the lining and will barely show, but if you are really worried, you are free to stitch it however you like!


Now you can finish tucking the lining inside the bag and pushing the corners out, etc. In theory, you could stop at this point, I suppose, but I never do - for better looks and stability, it's worth taking just a moment more to topstitch around the outside of the top edge of the bag (you may wish or need to press the bag before you do this, depending on your fabric).


The topstitching, as I said, not only helps keep the lining inside and the handles in place, but it makes the bag lay flatter and look nice:


Number two bag of five! This one still took under an hour, even though I had to keep stopping at every step and work out what to photograph. In fact, it's taken me far longer to write this tutorial than it would have to go upstairs and make another bag...


Sunday, July 03, 2011

Red, White, Blue


Red, white and blue is not a combination I am normally very fond of, but the Rainbow Scrap Challenge this month is those patriotic colours, so I decided to give it a go in a small way. I tried to use any and every shade and hue of blue and I admit that I didn't strictly stick with white white, but instead some sort of very white creams. The red centres are pieced from small bits from my scrap basket and the blues all come from either my blue scrap drawer or my blue strip stash. The whites, I admit to pilfering from my main stash - I don't have a lot of scrap whites, apparently (plus, with both the reds and blues scrappy, I wanted to use just a few whites to tame it a bit). There are 20 6" blocks, so this will be another charity baby quilt, which I think it will work very well for.

I also have started making tote bags this weekend for teachers' presents - 2 down, 3 to go. Watch for a totebag tutorial (tote-torial!) tomorrow or Tuesday...

Saturday, July 02, 2011

Purple Baby Quilt


So, I got the first of the baby quilts quilted today - this is a good thing as this baby has actually been born already (but only just). It will be a little late as a gift, but at least it meant I knew the baby was a girl and could choose a top which is less neutral than some of the others! Tomorrow I will be attaching binding and then sewing it down in the evening, and hopefully it can wing its way to its new home on Monday. I used a sort of echoing heart pattern across the whole top. The backing is a piece of purple hand-dye - you can see it peeking out from behind the finished piece.


Friday, July 01, 2011

Torn Text Swap


The theme for these ATCs was torn text. I've done a couple of swaps with torn paper (as opposed to cut paper) and this time, the paper which had to be torn was text...


Yes, it did take a while to do the spiral!


This one uses a transparency (acetate), which I had leftover from another swap.